This post covers how to migrate a Plex Media Server (PMS) running on Synology DSM 7 to a Proxmox Plex LXC. This Plex LXC will then NFS mount your media library from the Synology, so your large media library remains on Synology.
Why would you want to do this? Well some Synology NAS models don’t have built-in GPUs so if you want to hardware transcode video you are out of luck. Or maybe you want lessen the CPU load on your Synology and move PMS to an external server.
You can follow my post Proxmox: Plex LXC with Alder Lake Transcoding to help you build a Plex LXC on Proxmox. This migration guide while tailored for Synology to Plex LXC, would not take too much modification to use it for other migration scenarios between Linux-based systems.
Pre-flight Check
Before we start the migration we need to check how large the Plex Media server instance is (NOT including your library media files). This will dictate how much disk space your Plex LXC instance will need (and space to grow). Plex maintains a lot of metadata and indexes which can grow pretty large, and those are not stored in your media library but with the PMS instance itself.
1. Login to your Synology where your old Plex server is running.
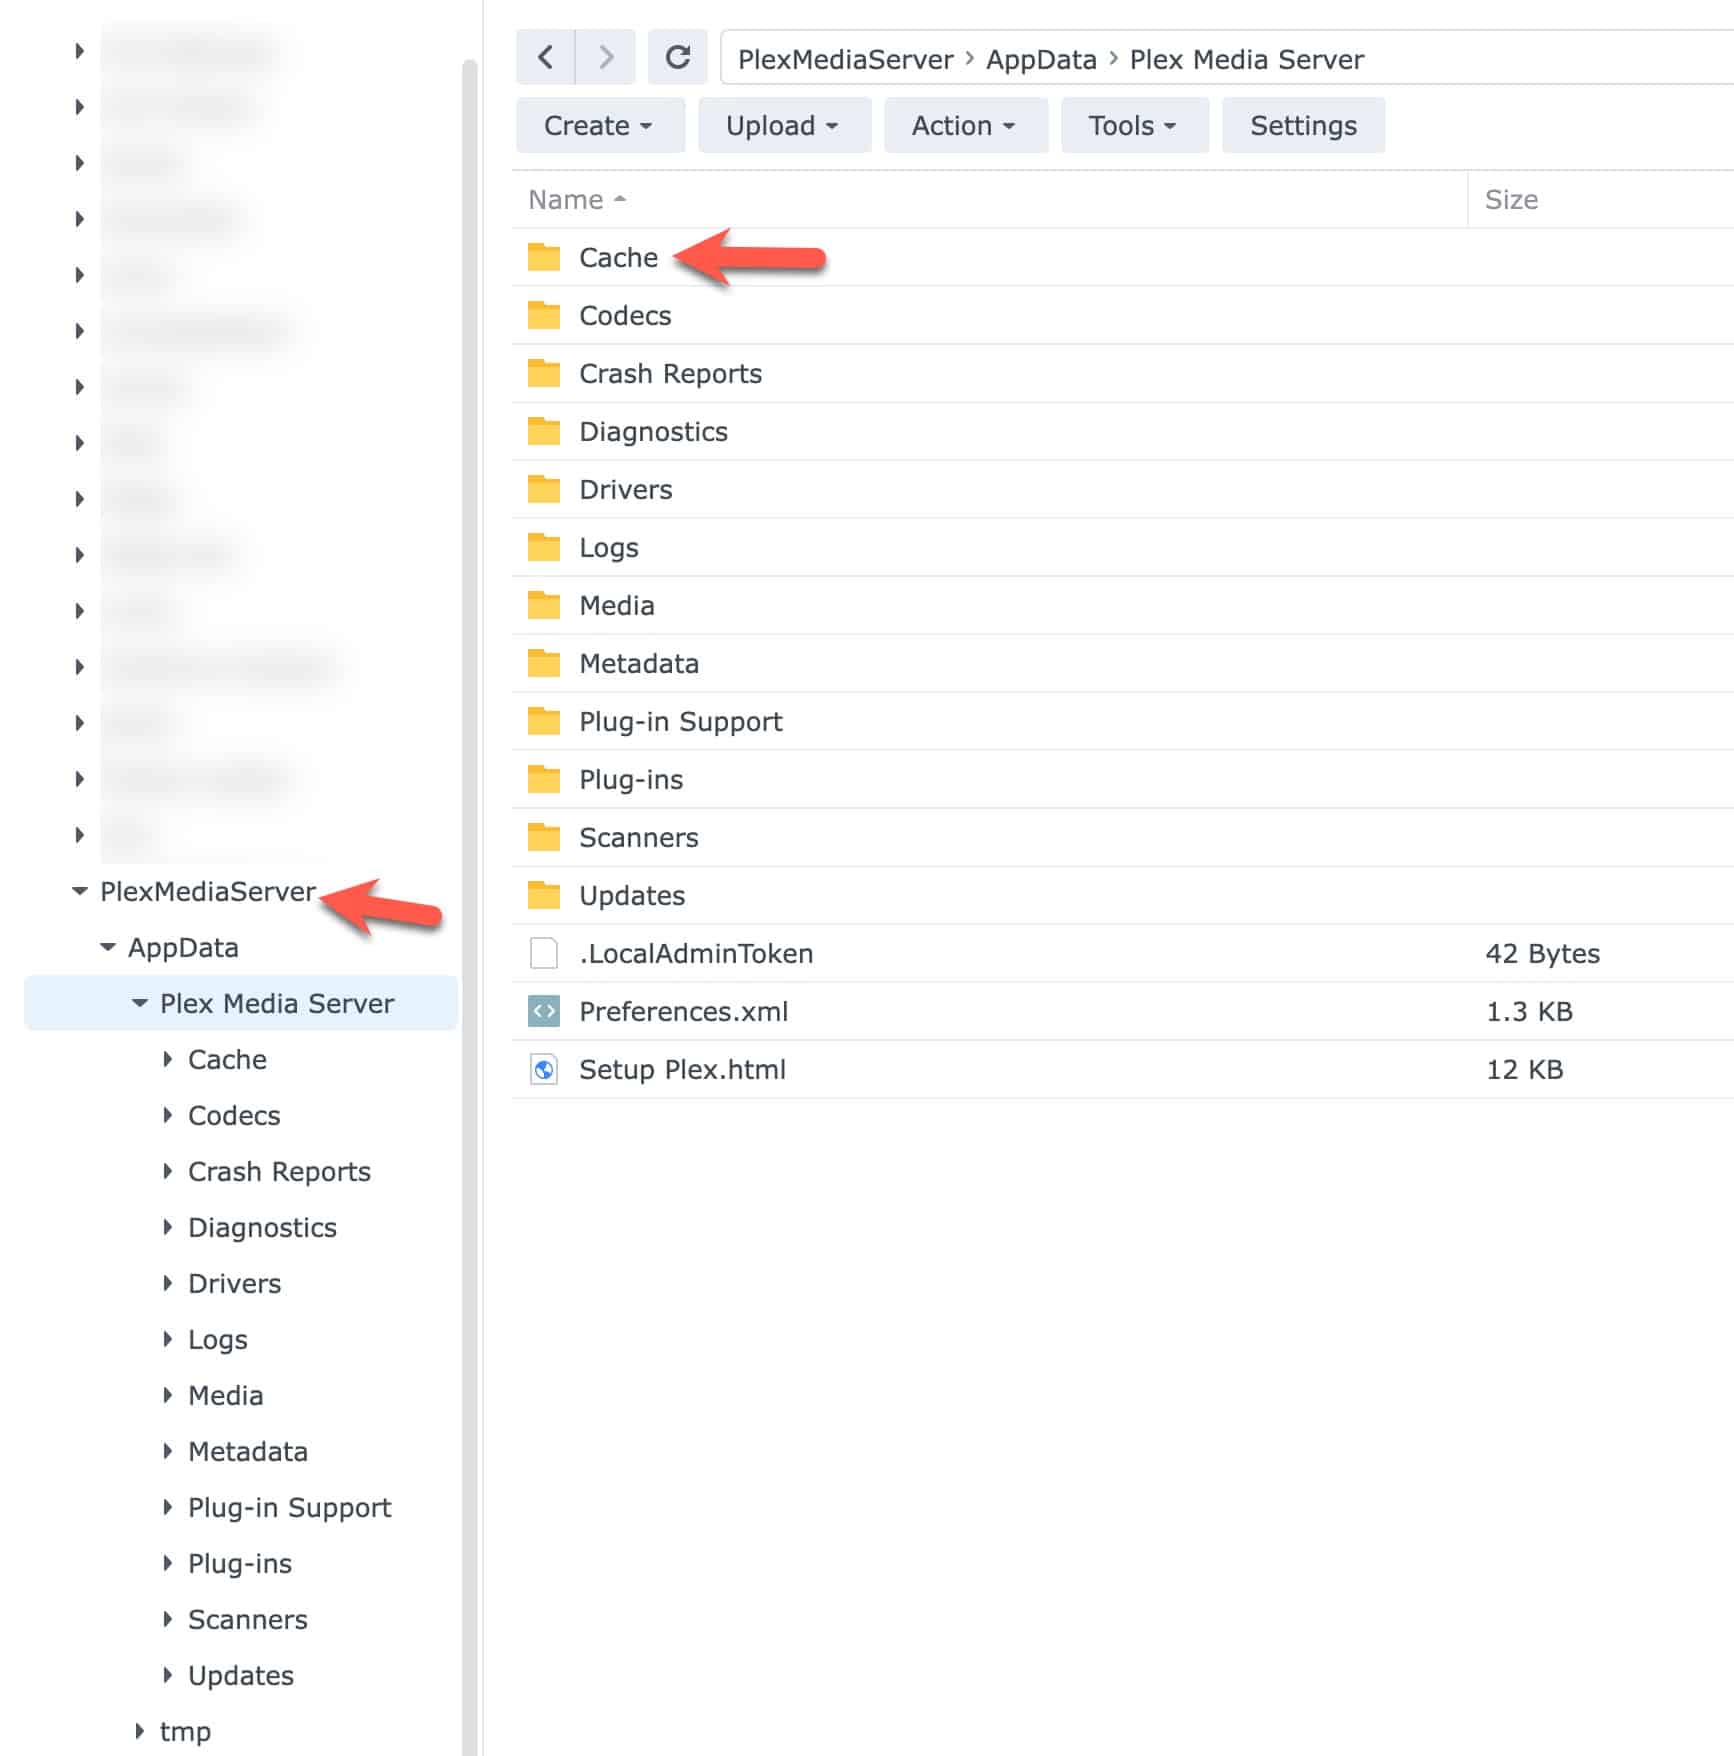
2. Open File Station, then at the root level expand PlexMediaServer -> AppData -> Plex Media Server.
3. On the Plex Media Server folder in the left pane right click and select Properties.
4. Wait for the Size: to fully populate and notate how large it is.
5. Expand Plex Media Server and click on Cache in the left pane.
6. In the left pane right click on Cache and look at the Size: property.
7. Subtract the Cache size from the PMS size to get an idea how much data you will be migrating.
Note: To properly size your Plex LXC disk, double the amount of storage that you just calculated. Then I would add another 5GB (or more) as buffer space. We will temporarily need both the full archive file and its unzipped contents occupying disk space at the same time. After everything is working, we can delete the tar file to free up that disk space.
8. If your Plex LXC disk size is smaller or similar in size to your calculated space, we need to expand the Plex LXC disk.
9. If you need to expand your LXC disk size, go to your Proxmox UI and locate your Plex LXC server. Shut it down.
10. Click on Resources in the middle pane for your Plex LXC and click on Root Disk.
11. From the tool bar select Volume Action. Select Resize.
12. Enter the amount of GB you want to increase the server’s storage by, not the total final size.
13. Wait for the disk resize operation to complete.
14. Start the Plex LXC server.
15. Look at the version of Plex server on your Synology and your LXC container. Do any needed updates to make sure they match exactly.
16. On your Synology open File Station and locate where your media library is stored. This is where all your music, videos, photos, etc. live. Take a note of the folder name(s).
17. Open Synology Control Panel, click on Shared Folder, and verify that your media folder(s) are shared. In my case I have a folder at the root level called Media which Plex uses and it’s already setup as a shared folder.
Plex Configuration Backup
1. Login to your fresh Plex LXC instance via the web.
2. Click on the wrench in the upper right corner to open settings.
3. In the left pane select your Plex LXC server instance. (Important!)
4. Under Settings -> General click on Sign out.
5. SSH into your Plex LXC instance and login as root. Run the following command to stop the Plex media server service.
sudo service plexmediaserver stop
6. Login to your Synology, open Package Center, and stop the Plex Media Server service.
7. SSH into your Synology.
8. Find the location of where your Plex Media server is located. Check out this Plex support article for common paths.
9. In your SSH session CD to the following path (change if your location is different):
cd "/volume1/PlexMediaServer/AppData/"
10. Now we will tar the whole Plex Media Server folder, excluding the Cache directory.
tar --exclude='./Cache' -zcvf plexserver.tar.gz "./Plex Media Server"
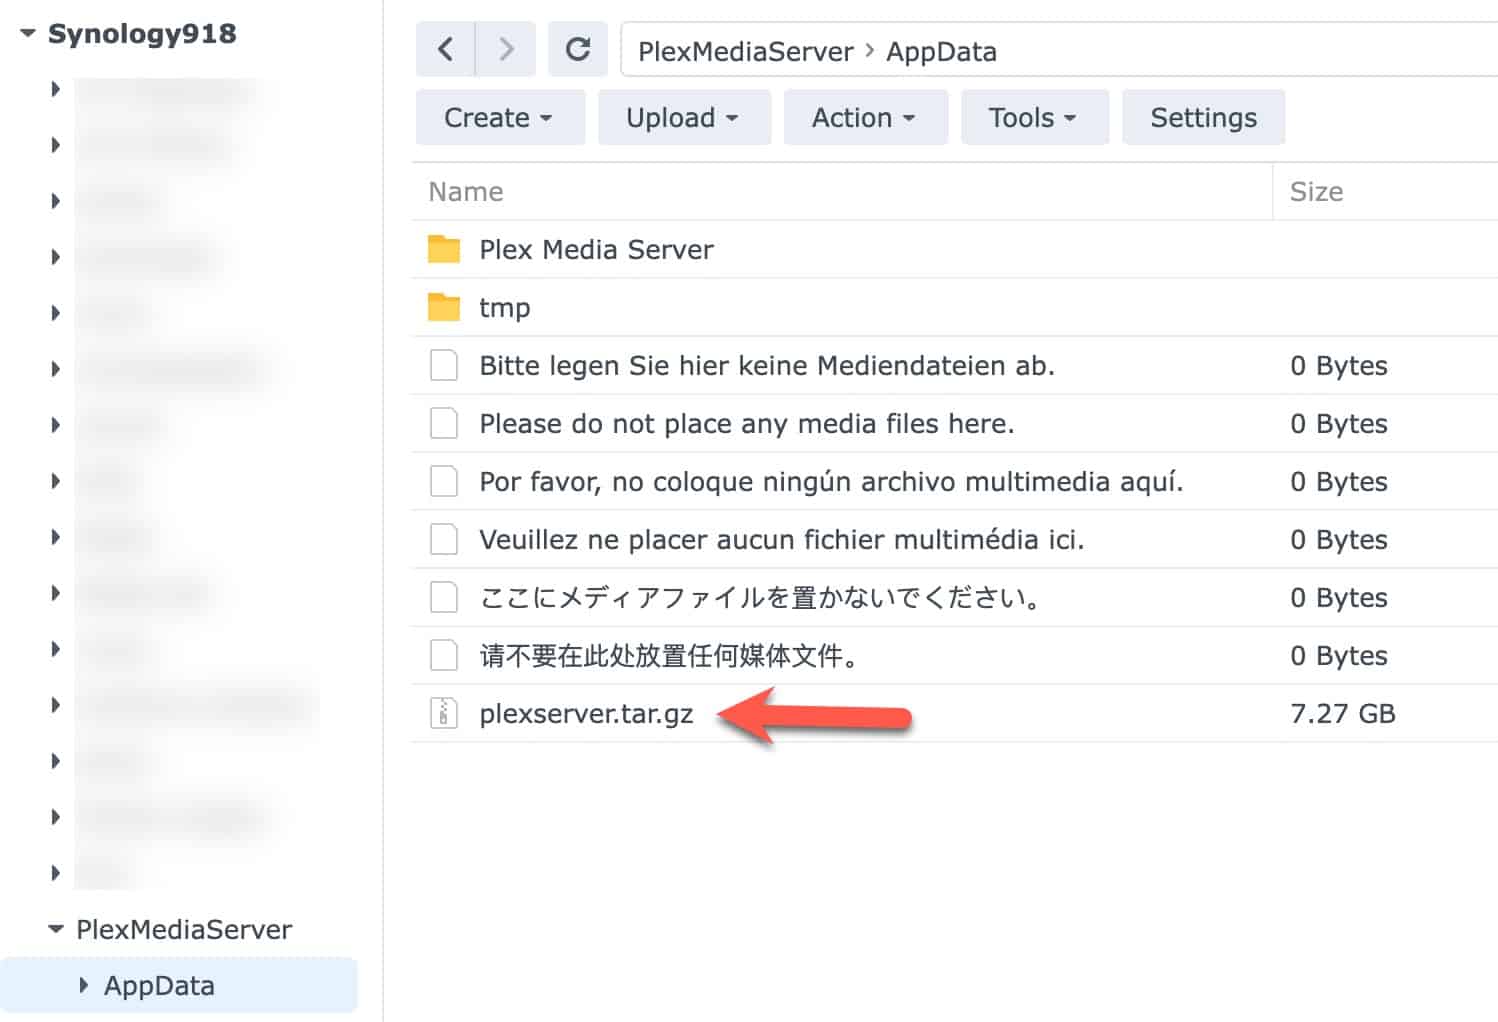
11. Back on your Synology open File Station and navigate to PlexMediaServer (root level) -> AppData.
12. If needed, click the file refresh button that looks like a circle with an arrow.
13. Right click on plexserver.tar.gz and download it to your computer.
Plex Configuration Restoration
- Open a SFTP session to your Plex LXC container.
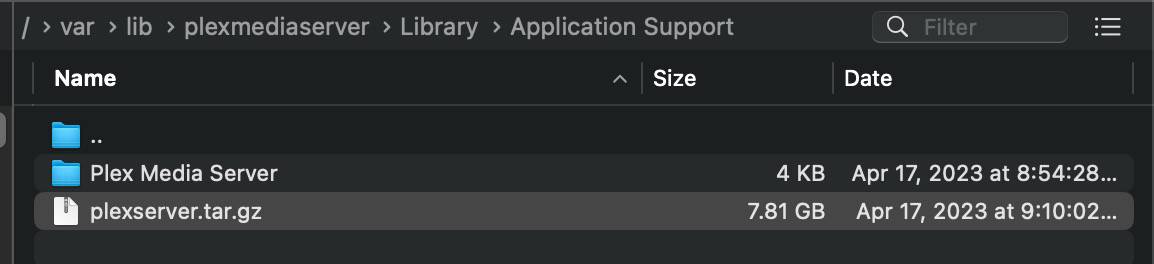
- In your SFTP client navigate to:
/var/lib/plexmediaserver/Library/Application Support/
3. Upload your tar file to the Application Support folder.
4. SSH into your Plex LXC and let’s backup the fresh Plex Media Server directory so we can revert back if needed.
					cd "/var/lib/plexmediaserver/Library/Application Support"
tar --exclude='./Cache' -zcvf plexserver-lxc.tar.gz "./Plex Media Server"
5. Wait for the backup to complete. It should be fast and small. Now let’s extract the Synology backup and over-write the existing Plex Media Server directory contents.
					 tar -xvzf plexserver.tar.gz .
 chown -R plex:plex "./Plex Media Server/"
6. Reboot your Plex LXC.
7. Open a browser and connect to your Plex LXC instance (http://IP:32400/web) and login.
8. If all goes well you should see the thumbnails of your recently added content. Your library will NOT be working at the moment though. That’s coming up.
9. In the Plex console under Settings click Remote Access.
10. Reconfigure as needed to ensure your new Plex LXC instance has inbound internet access. (Optional)
11. If you wish to rename your Plex server, under Settings click on General. In the right pane change the Friendly name.
12. If everything is looking good so far, you can now delete the local copy of the Synology Plex backup. If you want to keep it longer, help yourself. I would keep a copy on your local computer until you give Plex a good workout over the coming days to make sure everything is good.
					cd "/var/lib/plexmediaserver/Library/Application Support"
rm plexserver.tar.gz
NFS Setup
1. On the Synology open the Control Panel then click on Shared Folder.
2. Locate the media library folder(s). Right click and select Edit.
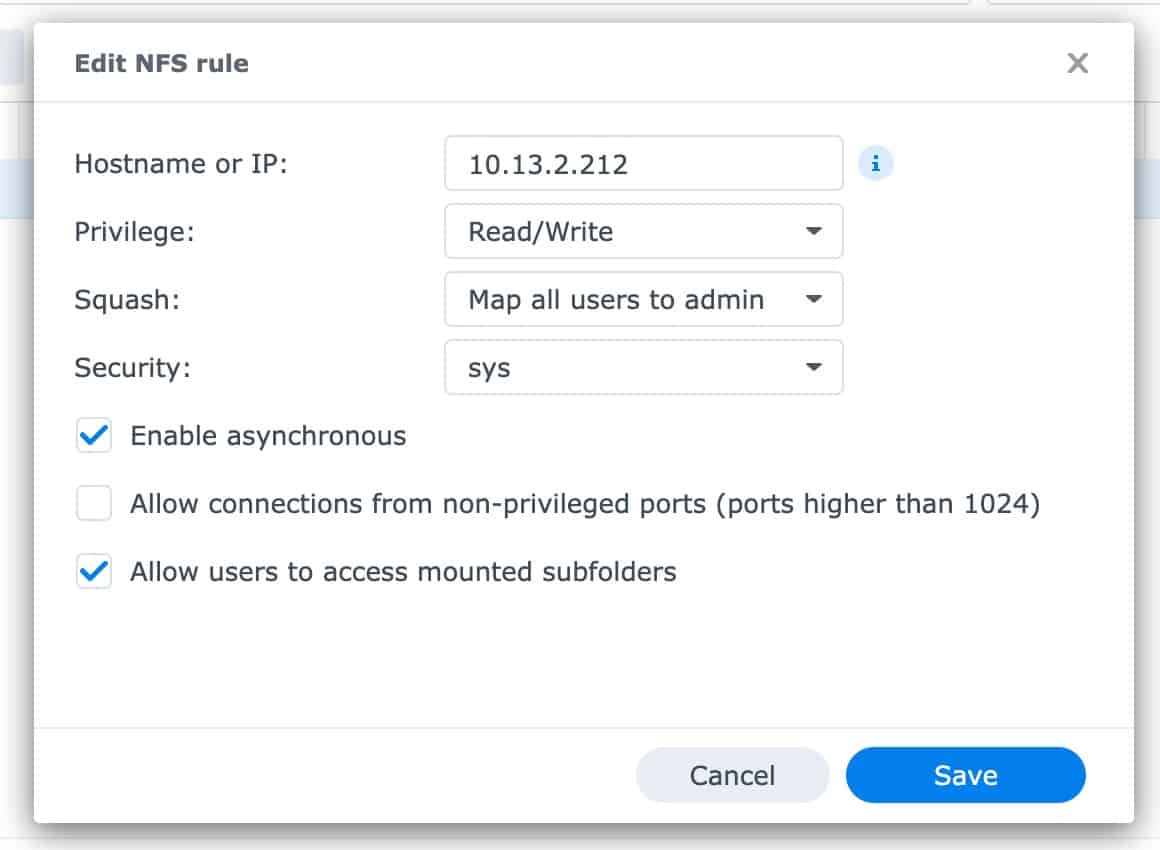
3. Click on the NFS Permissions tab. Click Create.
4. Add the IP address of your Plex LXC server.
5. Change the Squash to Map all users to admin.
6. Click Save. Click Save again.
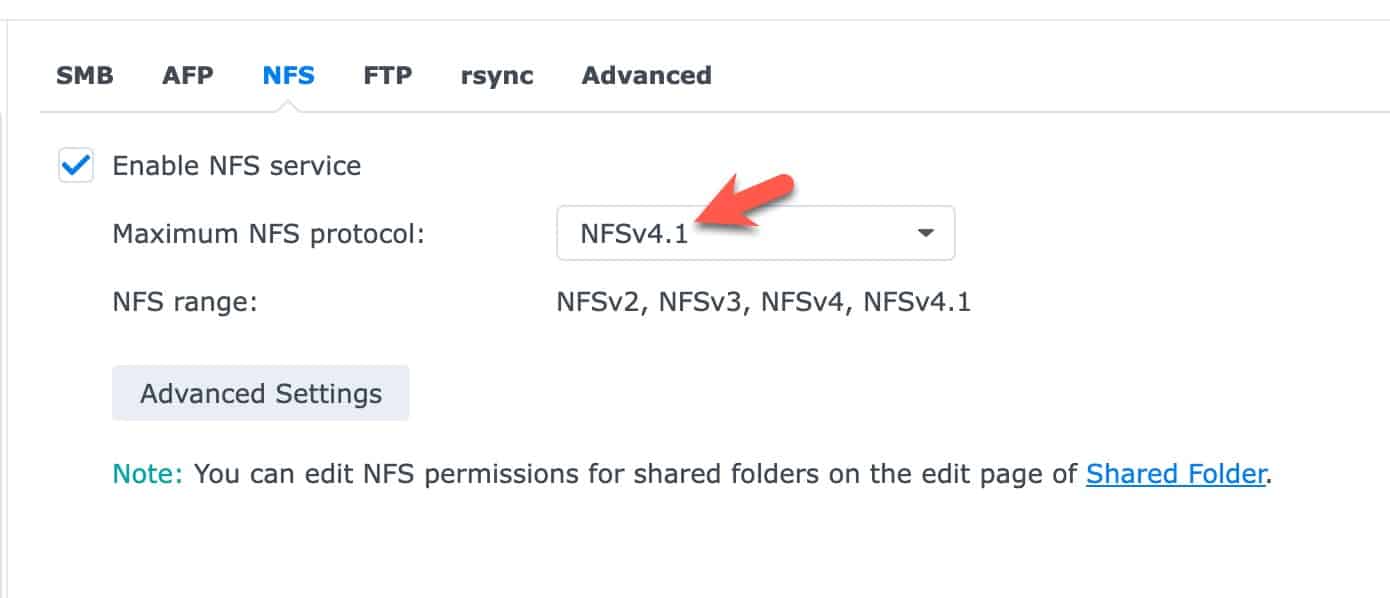
7. In the Synology Control panel to go File Services in the left pane.
8. Click on NFS and make sure NFS is enabled and change the maximum version to NFSv4.1. Click Apply.
9. Open a SSH session to your Plex LXC.
10. Run the following commands:
					sudo apt update
sudo apt install nfs-common
11. Now let’s make a media library mount directory (pick any name or path you want), and let’s do a test mount:
					mkdir -p /mnt/Media
nano /etc/fstab
12. Add the following line, change the IP and mount paths as needed, then save and exit Nano.
10.13.2.230:/volume1/Media /mnt/Media nfs vers=4.1,nouser,rsize=131072,wsize=131072,atime,auto,retrans=2,rw,dev,exec 0 0
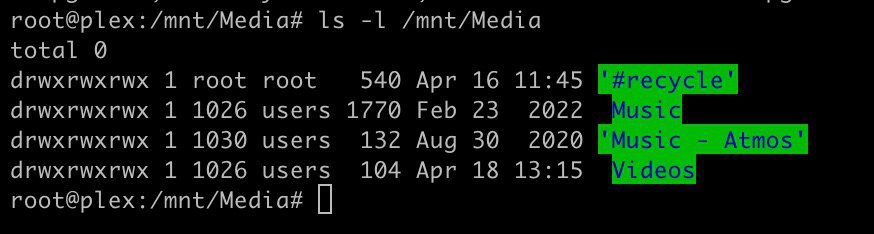
13. Test the mount. You should not get any permission denied or other messages. Silent completion means it worked. The directory listing should show files/folders on your Synology.
					mount -a
ls -l /mnt/Media
14. Go into the Plex web UI, and in the left pane all the way at the bottom under Manage click on Libraries.
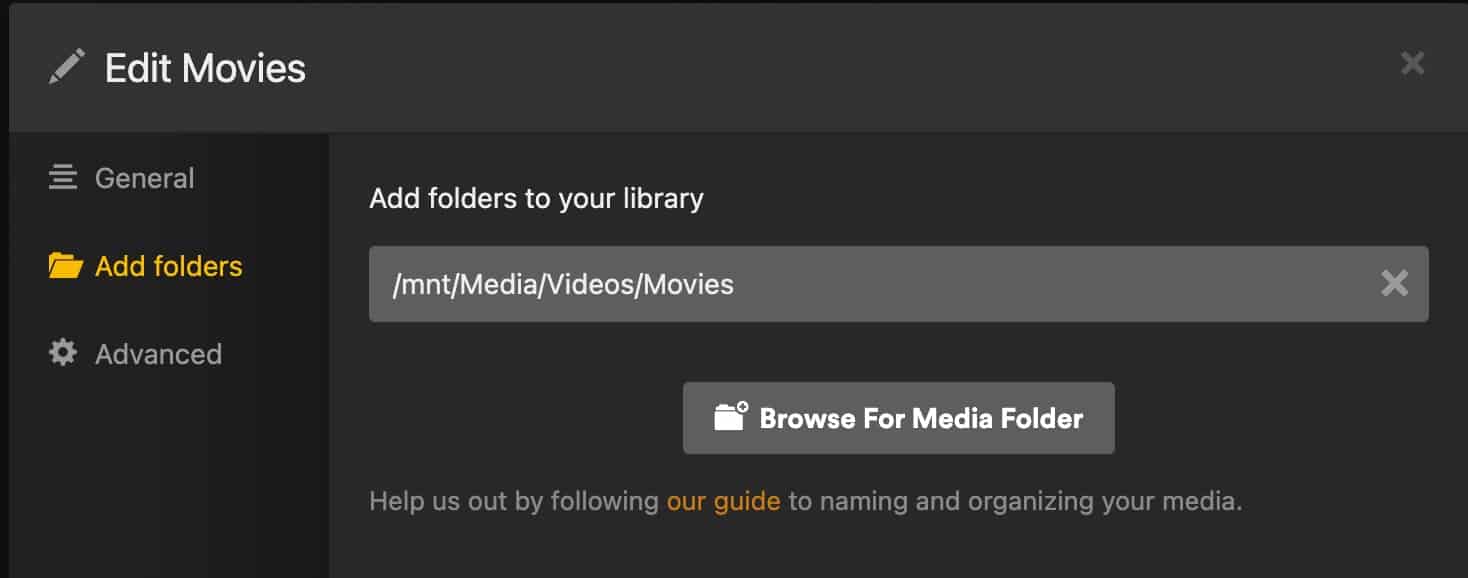
15. For each library hover over the name and click Edit Library.
16. Click on Add folders and modify the path. In my case I just substituted ‘mnt‘ for ‘volume1‘. Click on Save Changes and wait while it processes the folder. Repeat for each library.
NAS Mount Monitoring (Optional)
There may be times when you reboot your NAS or there’s a network hiccup and your Plex LXC loses the NAS NFS mount. This optional section will setup a cron job to check the mount status every 10 minutes, and if the specified mount isn’t mounted it will attempt to mount the NFS share.
- SSH into your Plex LXC and run the following command:
					mkdir /opt/plex
sudo nano /opt/plex/nas_check.sh
2. Paste in the code below and change the mount= path to your NAS Media share. Save and exit Nano.
					#!/bin/bash
mount="/mnt/Media"

if grep -qs "$mount" /proc/mounts; then
  echo "It's mounted."
else
  echo "It's not mounted."
  mount "$mount"
  if [ $? -eq 0 ]; then
   echo "Mount success!"
  else
   echo "Something went wrong with the mount..."
  fi
fi
3. Change permissions on the script:
sudo chmod 555 /opt/plex/nas_check.sh
4. Open the crontab:
sudo crontab -e
5. Add the following line in the crontab. Save and exit.
*/10 * * * * /opt/plex/nas_check.sh
Summary
Migrating your Plex Media server from a Synology to a Plex LXC on Proxmox is not too hard. Nearly all of your configuration settings are maintained. And assuming you mount your existing Media Library from the Synology, Plex will re-associate the media files with its internal database. It will go through your music library and re-analyze each track, but all metadata, ratings, and play lists should remain intact.